Cool Easy DIY Crafts- 2024 at Home
Introduction:
In the present occupied world, setting aside opportunity for imagination and relaxation can challenge. Be that as it may, DIY Crafts makes offer the ideal answer for loosen up and communicate your inventiveness without leaving the solace of your home. Whether you’re an accomplished DIYer or a novice, there are a lot of perfect and simple Do-It-Yourself specialties to attempt in 2024. From upcycling old materials to making popular improvements, the following are 15 Cool Easy DIY Crafts to move your creating venture.
1. Macrame Inside Decorations:
Macrame has gotten back in the saddle lately communicating offers loosen opportunities and for good explanation. This antiquated specialty includes tying ropes together to make mind boggling plans and examples. Making a macrame wall decoration is a tomfoolery and loosening up project that requires negligible supplies. All you want is some macramé rope, a wooden dowel and scissors.
There are incalculable instructional exercises accessible online to direct you through the interaction, making it simple for amateurs to get everything rolling. Try different things with various tying procedures and consolidate dabs or plumes for added visual interest. You can likewise mess with various rope sizes and varieties to make special examples to supplement your home.
2. Terrariums DIY Crafts:
Terrariums are a gardens housed in glass holders, making them ideal for little spaces. Making your own terrarium is a basic and remunerating Do-It-Yourself project that allows you to flaunt your green thumb. Begin by social event with a glass compartment, delicious plants, soil, and enhancing rocks or stones.
Organize the plants and shakes inside the compartment, leaving a lot of space for development. Terrariums require negligible upkeep and can add a hint of nature to any room in your home. Get inventive with various plant blends and holder shapes to tweak your terrarium. You can likewise try different things with adding puppets or other enriching components to cause an unusual situation inside your terrarium.
3. Hand Squeezed Texture:
Tweaking texture with hand-decorated plans is a great method for adding an individual touch to your home. You can utilize stamps produced using family things, for example, potatoes or wipe brushes to make extraordinary plans on texture. Just plunge the stamp in texture paint and compress it onto the outer layer of the texture to move the plan.
This Do-It-Yourself project is ideal for making your own tea towels, pillowcases, or even attire. Allow your creative mind to roam and explore different avenues regarding different stamp plans and varieties to make exceptional pieces. Think about blending and matching stamps to make multifaceted plans, or joining stepping with different procedures, for example, stenciling or block printing.
4. Weaving Loop:
Loop weaving is a flexible specialty that permits you to explore different avenues regarding various fastens and surfaces. Start by extending the texture into the weaving circle and getting it set up. Then, at that point, use weaving string to make many-sided plans on the outer layer of the texture. You can browse a wide assortment of weaving lines, including silk fasten, back join, and French bunch, to make lovely plans and pictures.
Loop weaving is an unwinding and thoughtful art that is ideally suited for the two fledglings and experienced stitches. Make your own plans motivated naturally, mathematical shapes or your number one statements to give your home a special touch. You can likewise try different things with various sorts of texture and string to accomplish various surfaces and impacts.
5. Do-It-Yourself Beeswax Wraps:
Express farewell to dispensable cling wrap and hi to Do-It-Yourself beeswax bundling! These eco-accommodating options are produced using cotton texture covered with a combination of beeswax, pine tar and jojoba oil. Beeswax wraps are ideal for covering bowls, wrapping sandwiches or putting away extras. Making your, textures bees wax wraps is simple and savvy, requiring only a couple of straightforward fixings and some essential sewing abilities.
Besides, you can modify the size and example of your wraps to suit your requirements and style. Explore different avenues regarding different texture prints and varieties to make wraps that are both utilitarian and snazzy. You can likewise add rejuvenating oils to the beeswax combination to add a charming fragrance to your wraps.
6. Painted vases:
Change your houseplants with painted pots. This basic Do-It-Yourself venture will permit you to add a style to your home while displaying your number one plants. Begin by picking plain earthenware grower in different sizes and shapes. Then, at that point, use acrylic paint to make brilliant plans and examples on the outer layer of the pot. You can explore different avenues regarding mathematical shapes, dynamic examples or even unpredictable botanical plans.
When the paint is dry, seal the compartment with an unmistakable sealant to shield the plan from wear. Consider adding embellishments like metallic accents or decoupage for an additional curve. You can likewise paint examples or pictures that mirror the subject of the plant you are watering, like desert flora or tropical plants.
7. Texture Wall Craftsmanship:
Texture wall craftsmanship is a reasonable method for adding character and style to your walls. Begin by extending a piece of texture over a wooden casing or material strain bars and protecting it set up with staples or paste. Then use texture paint, stencils or iron-on foils to add plans and examples to the outer layer of the texture. Material wall workmanship is profoundly adaptable, permitting you to make pieces that supplement your current style and variety conspire.
You can hang different pieces together to make an exhibition wall or show one creation as a point of convergence. Explore different avenues regarding different texture surfaces and examples to make visual interest and aspect. You can likewise utilize texture scraps or old garments to make an extraordinary interwoven impact.
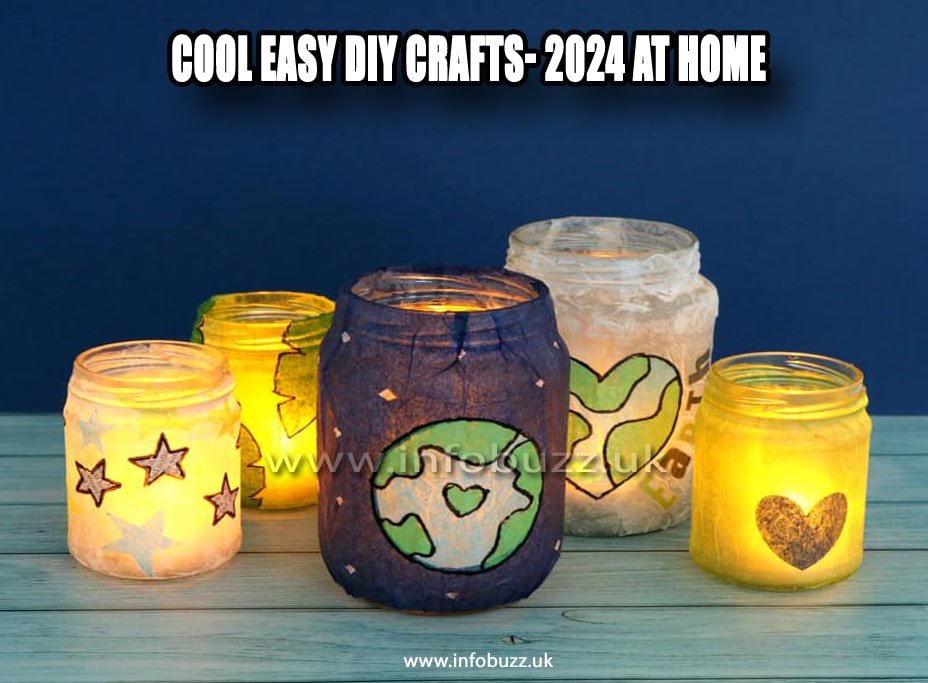
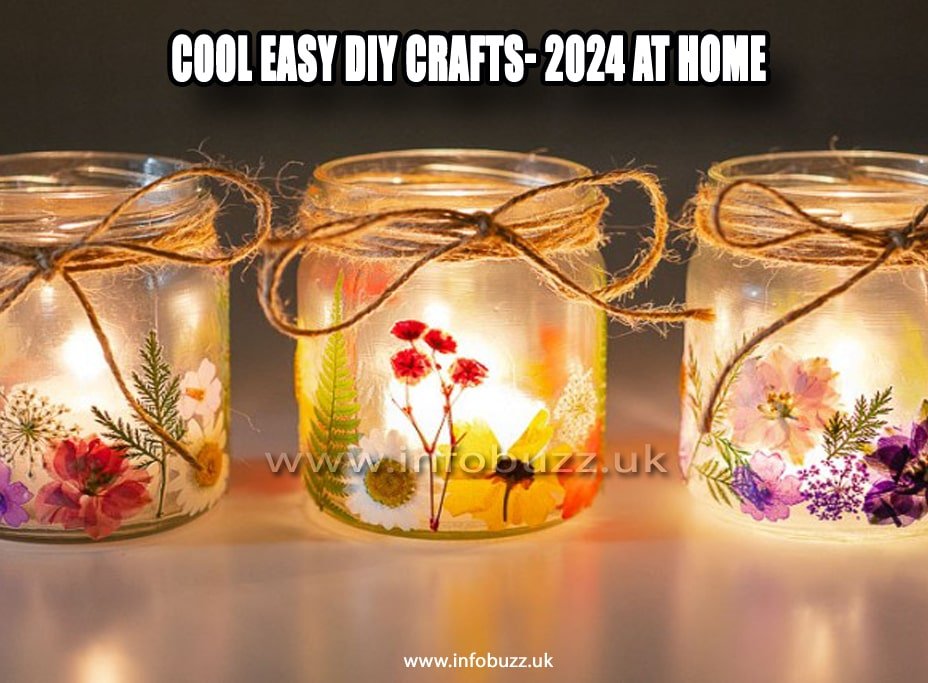
8. Do-It-Yourself Candles:
Making your own candles is a tomfoolery and compensating Do-It-Yourself project that permits you to explore different avenues regarding various fragrances, varieties and shapes. Begin by softening soy wax drops in a twofold evaporator and adding scent oil and candle color to make the ideal fragrance and variety. Then empty the liquefied wax into compartments or forms and spot a wick in the middle. Permit the candles to cool and solidify before you trim the wick and partake in your handcrafted manifestations.
Do-It-Yourself candles make extraordinary gifts for loved ones or as a gift for yourself. Explore different avenues regarding different holder shapes and sizes, as well as one-of-a-kind fragrance mixes, to make candles that suit your own style and inclinations. You can likewise add embellishing components like dried blossoms or spices to the candles for added visual interest.
9. Upcycled Furniture:
Revive old furniture with just the right amount of inventiveness and variety. Upcycling furniture is a feasible method for cleaning up your home while lessening waste. Start by sanding the outer layer of the furniture to eliminate any current completions or defects. Then, at that point, apply a layer of preliminary and afterward the picked paint tone. To make a novel look, you can try different things with various work of art procedures, for example, upsetting, stenciling, or ombre impacts.
Upcycled furniture adds character and appeal to any space and permits you to communicate your style. Search for recycled household items at secondhand shops, deals, or online commercial centers and transform them into one of a kind pieces for your home. You can likewise reuse old household items for new purposes, for example, transforming an old dresser into a kitchen island or a rack into a bar truck.

10. Paper Quilling:
Paper quilling is a fragile and creation create that includes folding portions of paper into different shapes and examples. Utilize this flexible procedure to make staggering fine art, welcoming cards or even adornments. All you really want is some quilling paper, a quilling instrument and a little persistence to get everything rolling.
There are incalculable instructional exercises and examples accessible online to rouse your quilling projects, making it simple to learn new strategies and trial with various plans. Paper quilling is an unwinding and restorative specialty that is ideally suited for easing pressure and communicating your inventiveness. Try different things with various paper widths and varieties to make remarkable plans, or consolidate quilling with different procedures like composition or weaving for more visual interest.
11. Do-It-Yourself Shower Bombs:
Spoil yourself with custom-made shower bombs. These shimmering treats will add a hint of extravagance to your shower and are shockingly simple to plan. Begin by consolidating baking pop, citrus extract, epsom salt, and cornstarch in a bowl. Add a couple of drops of your number one medicinal ointments and a modest quantity of water to consolidate the fixings.
Blend until the combination looks like wet sand, then fill it into molds and pass on to dry for the time being. When dry, you can redo your shower bombs with food shading, dried blossoms, or sparkle for a spa-like involvement with home. Do-It-Yourself shower bombs make incredible gifts for loved ones or as an extraordinary treat for yourself in the wake of a difficult day.
12. Keychains from Material Waste:
Go through your texture scraps by making key chains. These charming and reasonable adornments are ideally suited for spending texture scraps and adding variety to your keys. Begin by cutting texture scraps into little square shapes or squares and sewing them together to make an interwoven plan.
Then, at that point, overlap the segment of texture in half the long way and sew along the edge to make a cylinder. Before sewing the closures, turn the cylinder back to the front and embed the key ring. Texture key chains make incredible gifts for loved ones or as a little gift for yourself. Try different things with various texture prints and varieties to make keychains that mirror your own style.
13. Do-It-Yourself Tuft Wreath:
Add a happy touch to any festival with a Do-It-Yourself decoration festoon. This vivid embellishment is ideal for a birthday, child shower or any unique event. Begin by cutting the tissue paper into strips and collapsing them in half longwise. Then, wipe the unfurled edge of the tissue paper with scissors, leaving the collapsed edge in one piece.
Unfurl the tissue paper and roll it firmly to frame a decoration, leaving a little circle at the top. Secure the circle with a piece of twine or twine, then cushion the tuft to make a full, feathery festoon. You can explore different avenues regarding various varieties and lengths of tissue paper to make your own festoon to match your party subject.
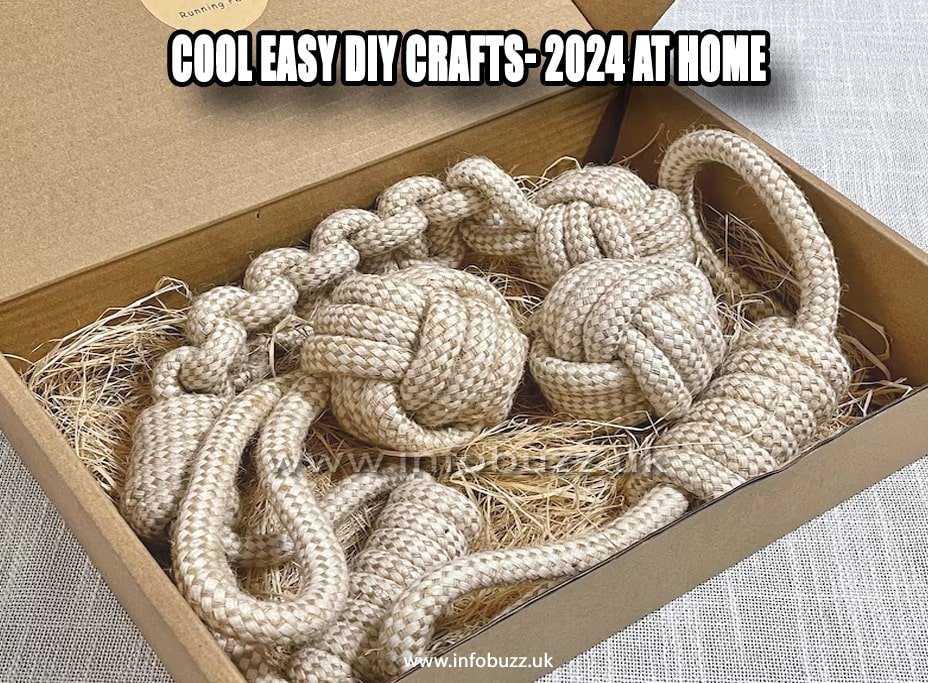
14. Do-It-Yourself Rope Bin:
Put together your space in style with a Do-It-Yourself rope bin. These adaptable stockpiling arrangements are great for putting away all that from covers and cushions to toys and magazines. Begin by contorting the rope into a circle to frame the foundation of your crate. Then, at that point, keep winding the rope and folding it over the base to shape the sides of the bushel.
Utilize heated glue to get the rope set up. Whenever you have arrived at the ideal level, cut the rope and fold the end under the loops to finish the bushel. You can try different things with various varieties and thicknesses of rope to make bins that match your home stylistic layout. Add handles or embellishments like tufts or pom-poms for additional style.
15. Do-It-Yourself Splash-Color:
Get sweet with Do-It-Yourself splash-color! This exemplary art never becomes dated and is a pleasant method for adding a wind to your closet. Begin by hosing a plain white piece of clothing, for example, a shirt, hoodie, or sack. Then utilize elastic groups to make designs by bending, collapsing, or folding the texture. Blend the ideal shades of texture color as indicated by the guidelines on the bundle and apply them to the texture utilizing crush jugs or brushes.
Whenever you’ve applied the color, envelop the texture , cling wrap, or a plastic sack and allow it to sit for a couple of hours to set the varieties. Flush the texture under cool water until the water runs clear, then wash and dry as indicated by the consideration directions. Try different things with various shading procedures, for example, ombre, twisting, or scrunch to make novel examples and plans.
